Set up passkey verification for WordPress
Enable passkeys by role, register your device and keep a recovery route before relying on device verification.
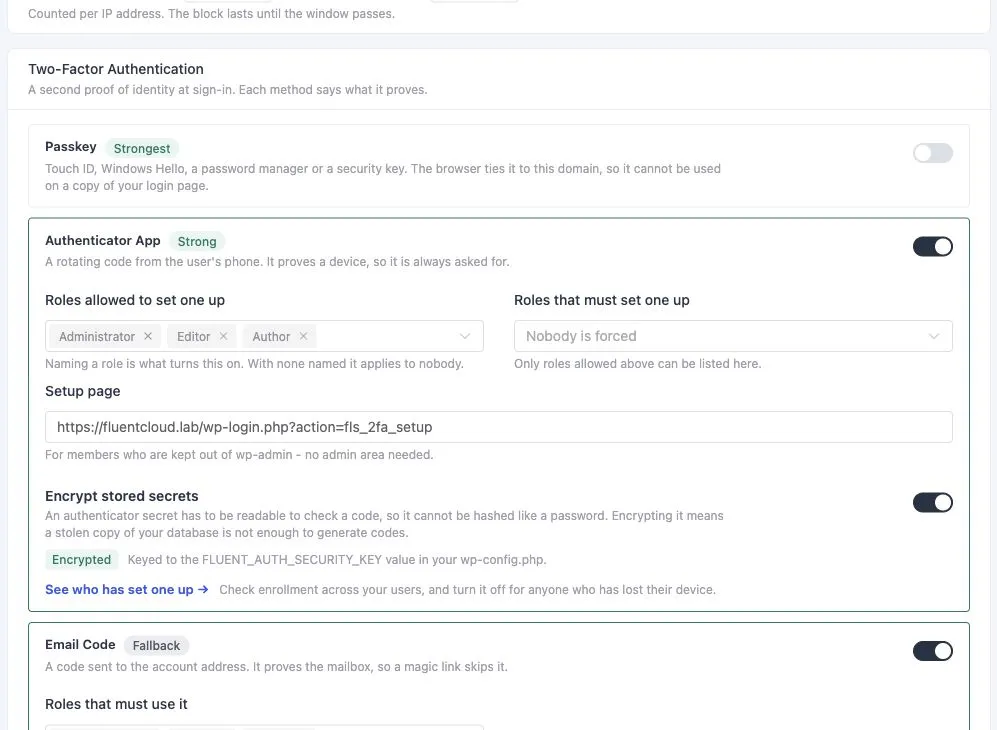
A passkey lets your device prove that you are signing in to the right site. You approve a browser prompt with a fingerprint, device PIN, security key or password manager instead of typing a username or password. FluentAuth added passkeys in 3.0.
Why a copied login page is a different problem
A password can be entered on the wrong website. A convincing copy of your WordPress login page may collect it even when the person signing in is careful about choosing a strong one. A passkey adds a credential scoped to the real site, so copying its appearance does not give another domain permission to use that credential.
WebAuthn defines how a browser uses public-key credentials for this verification. The server issues a fresh challenge, the authenticator signs a response, and the site checks it with the registered public key. Biometric verification, when used, happens with the authenticator rather than being sent to WordPress.
FluentAuth supports direct passkey sign-in without a username or password. Your browser or password manager discovers the saved passkey for the site, and the credential identifies your account. Approve the device prompt to sign in.
Follow the verification from browser to site
| Step | What happens | Why it matters |
|---|---|---|
| Start passkey login | Select Log in with passkey on the login page | No username or password needs to be entered |
| Find the credential | The browser or password manager offers saved passkeys for the site | The chosen passkey identifies the account |
| Approve the prompt | The user unlocks a compatible authenticator | Verification fits the device they use |
| Check the response | FluentAuth validates the signed challenge | A valid response signs in the account associated with the passkey |
Try the illustrated passkey walkthrough to see these steps in sequence.
Start with the administrator account
An administrator can install code and change settings, so start the rollout there. Open FluentAuth → Settings → General Settings → Two-Factor Authentication, enable Passkey, choose the eligible roles and save. Keep a working admin session while testing.
Your site needs HTTPS and PHP OpenSSL support. Each user needs a compatible browser and authenticator. An empty allowed-role list means the method applies to nobody.
Register and label the credential
Open Users → Profile → Passkeys. Give the device a recognisable name, choose Add a passkey, and complete the browser prompt. The credential belongs to your own account; another administrator cannot enrol on your behalf.
The device holds the private credential. Your WordPress site stores the public credential needed to verify its response. The website does not receive your fingerprint or device PIN.
Prepare for a lost device
FluentAuth does not challenge an account with a lone passkey and no fallback. Keep unused recovery codes, enrol an authenticator app, or register a second passkey. Choose a backup that remains accessible when your primary device or sync account is unavailable.
This is a useful rollout check: registering a credential and being ready to rely on it are two separate steps. If the passkey is not asked for, check the role, enabled method and fallback before assuming registration failed.
Test a complete login
Open a separate browser window and select Log in with passkey without entering a username or password. Choose your saved passkey and approve the device prompt. Then check that you can use your fallback. Retain your original signed-in session until both paths work. Do not revoke your only working credential during the test.
Passkeys are bound to a domain. A staging copy needs its own enrolment, and a domain change requires a fallback followed by registration for the new domain.
How it fits with magic links
Magic links prove access to the mailbox. Passkeys prove possession of a device credential. A required passkey can still follow a magic link; another email code would not provide that independent device proof.
See Passkeys for the detailed setup and Two-factor authentication for role enforcement and recovery.