
Installation
To install FluentAuth on your WordPress website, login to your WordPress Website, go to Plugins -> Add New and then Search for “FluentAuth”
Once you find the plugin, Click Install and then Activate.
Configure FluentAuth
There has few different section which you can configure in few minutes. Also, we have added our own recommendations that you can just apply, review and save.
Core Security Settings
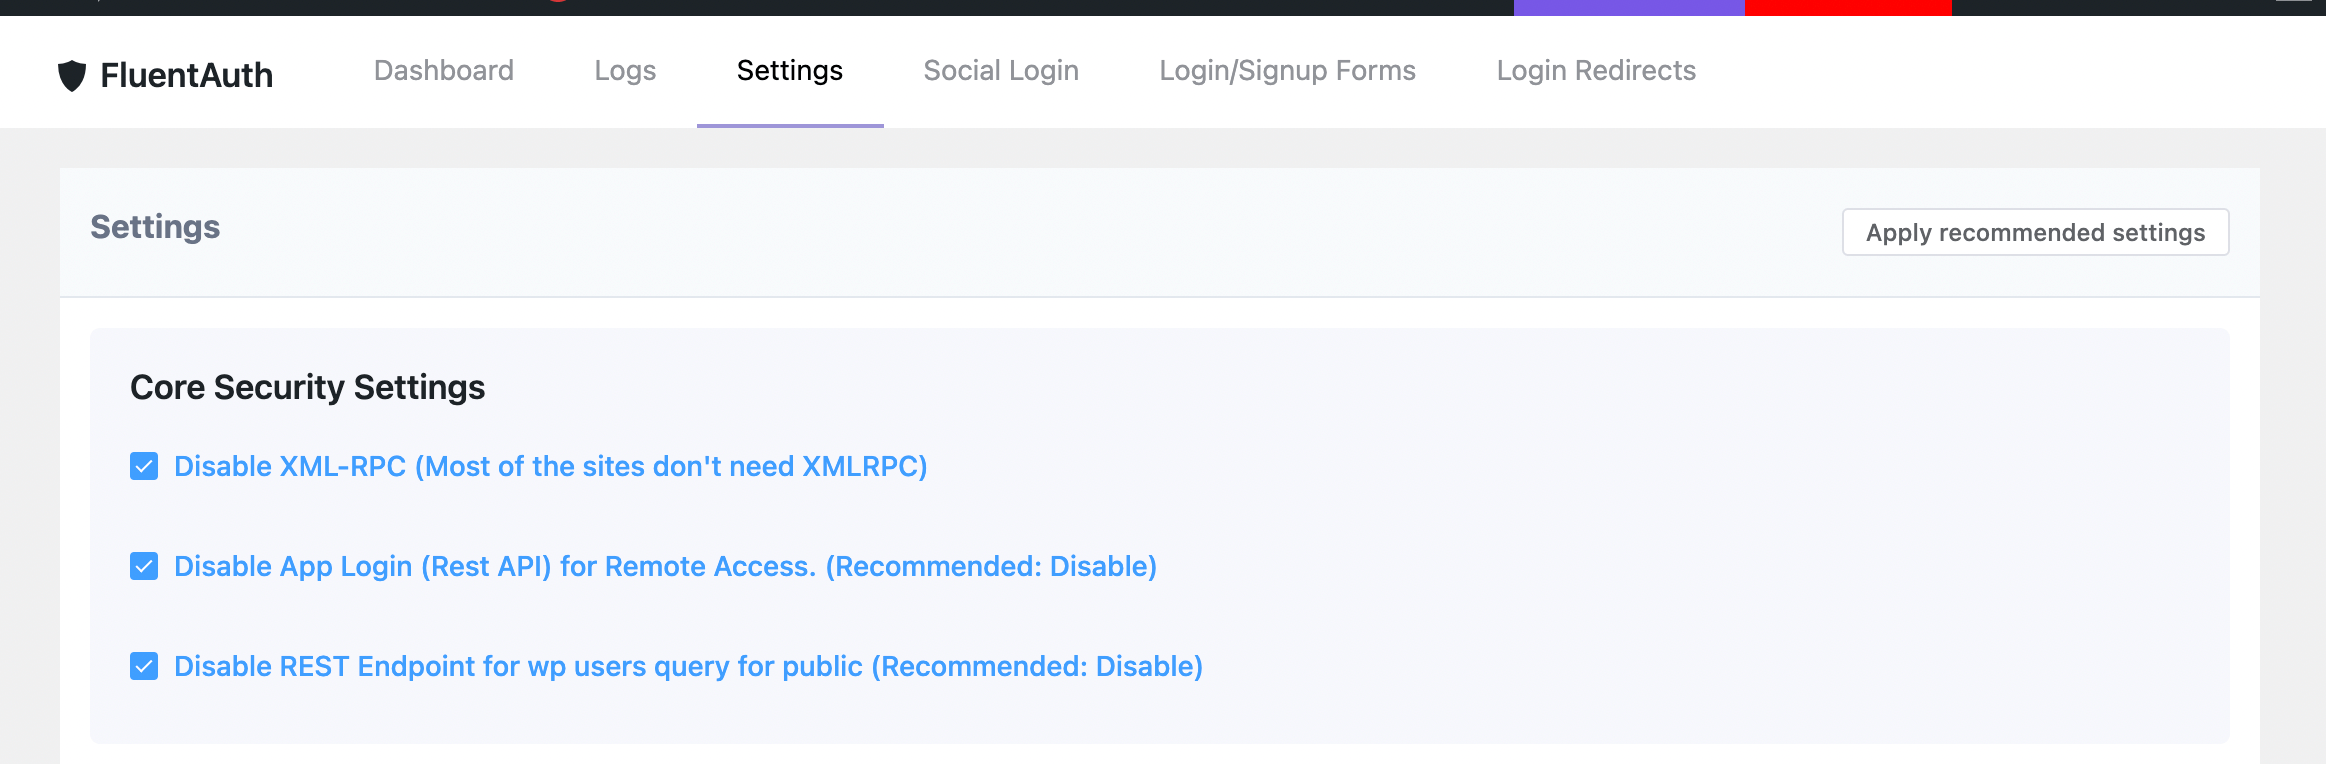
- XML-RPC: You may disable XML-RPC requests. 99% of the sites don’t need XML-RPC
- App Login: If you don’t connect your sites via REST API remotely then you may disable this. Most of the sites don’t require REMOTE REST API access
- WP Users REST Endpoint: By Default WordPress expose all the user lists to public via rest api including their username and IDs. You should disable this if you don’t use that explicitly.
Login Security Settings

You should definitely enable this security settings.
Then you may set how many times an IP address try to login and set the time frame.
The next settings is: Extend Login Options
If you want to enable feature where users can just type their email address and get a secure link (one time use for limited time) to login directly without typing the password then you can enable this feature.
If you want to disable this “Login Via Email (Magic Login)” for any specific user role then you can select those user riles.
Two-Factor Authentication Via Email
if you want certain user roles for Two-factor Login then you can enable this feature and select the user roles.
Other Settings
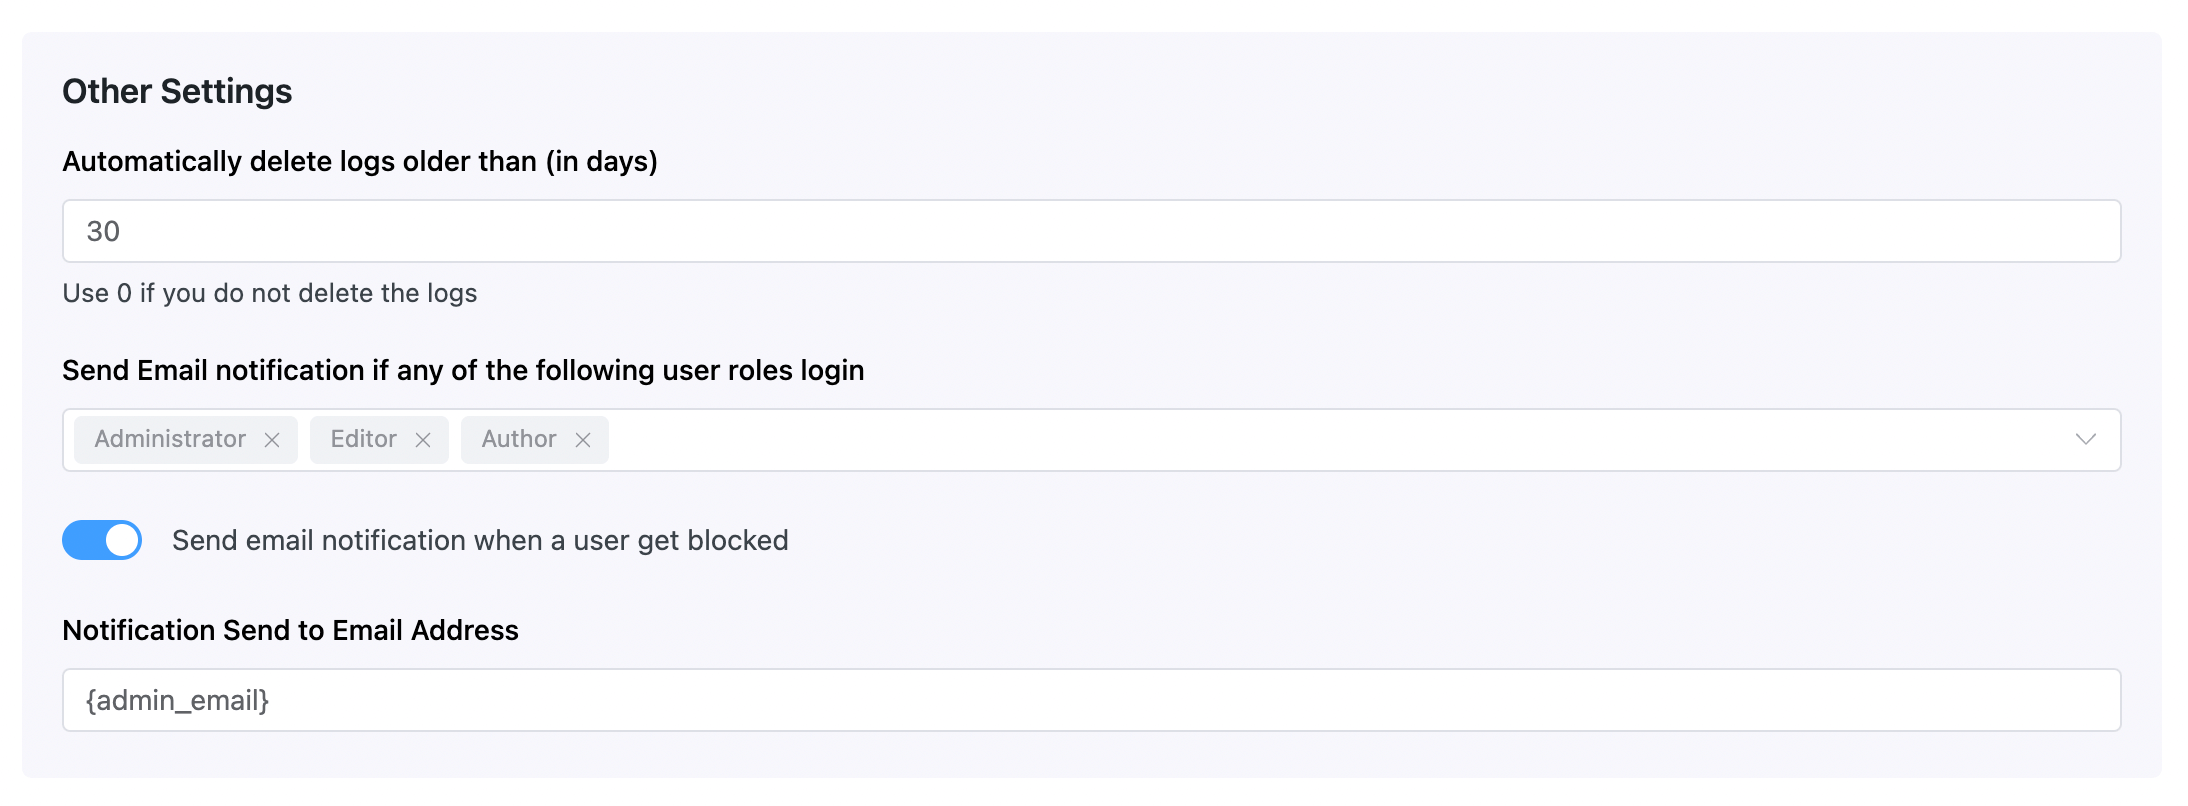
In these settings, you can set for how many days the logs will be stored in the database.
You may set getting email notification if a specific user role user login or get blocked so when they login or get blocked you will get email notification instantly.
The last input is where you want to get the notification. For multiple recipients, you can provide the emails as comma separated values.